

 I'm a self-employed web designer & photographer since 1998. But that's all business and this blog is all about my crafty hobbies! Throughout this blog you will find things like watercolor painting, paper crafting, stamping, card-making, copics, my own hand drawn digital stamps, beading, cooking, gardening, photography, photoshop, the antics of my 4 legged children, Emma & Francie!

 Sign up with your email and I'll let you know everytime I add a new digital stamp, photo, paper craft, or painting! Don't forget to click the link inside your sign up email from Feedburner to complete the subscription!


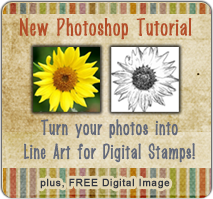
For this tutorial I'm using Photoshop CS3, but this lesson should work with most any version b/c it uses basic tools and filters. (I'm not sure about Photoshop Elements b/c I've never used it) This tutorial can work on most any type of photo, depending on what type of digital image you want to achieve. You can either isolate an object from a photo (like below) or, use the entire photo as a "scene" for a digital stamp image.
1. Let's start by isolating your object from the background of the image. Use your pen tool to create a new work path and select your object.


If you need help using the pen tool do a google search for a pen tutorial. Depending on your image there are other ways of selecting your object; such as selecting by color range. I find it easier to zoom in really close to select your image with the pen tool. Use your space bar to pan around the image as needed. Depending on the detail of your image this step could take a while, but will be worth it in the end! Here you can see my selection path!

2. After you have selected your object (by connecting the last dot to the first dot!) Then Save Your Selection as a New Path by dragging your "new path" on the palette down to the "create new path" icon at the bottom of your Path palette. It will name itself Path 1.


3. Next, Convert Your Path to a Selection by clicking the dotted circle icon at the bottom of your palette.

4. Then go back to your layers palette and hit "cmd/ctrl J" to duplicate your selection.
Name this layer "flower". (1)
Then create a new layer below the flower layer and fill with white. (2)


5. Now, you need to desaturate your image, that means remove all the color. At the bottom of your layers palette click the New Adjustment Layer icon (the half full moon). Click "Hue/Saturation" and slide the Saturation slider all the way to the left. This will make your image look black and white.


6. Your image may seem rather flat, so lets Add Another Adjustment Layer with levels to increase the contrast. Selects "Levels".

On the levels dialogue box the left black slider represents your shadows. The right white slider are your highlights. The middle grey is for your midtones.
I moved my shadows closer in to where the shadow information starts on the scale. I did the same with the highlights moving to the left.

Look at your own image and decide what looks best.

This will make better end results with the boost in contrast.
7. Let's put this new grayscale image on it's own new layer.
Hold Cmd/Ctrl and hit your flower layer and that will automatically select what you have on that layer.
Then do a Cmd/Ctrl + Shift + C and copy merge everything that is selected.
Then do a Cmd/Ctrl + V and paste and it will automatically paste onto a new layer. Be sure it is above all other layers.
You can name this new layer: "gray flower" or whatever you would like!! Your Layer palettes should look something like this:

Okay, lets start making this thing look like a stamp!! Now the real fun begins!
8. While you are still on the "gray flower" layer apply the "Smart Blur" filter.
Filter>Blur>Smart Blur
Set the Quality to High and the Mode to Edge Only.

These are the settings I used (above). You adjust your settings to fit your own image. Watch your image as you move the sliders.

Looking cool, huh? Now let's invert the image!
9. While still on the "gray flower" layer go to Image>Adjustments>Invert

Eeewww, groovy baby!! Stay on that gray flower layer, don't leave it yet!
Now, let's apply a black stroke to the flower!
10. Click on your Layer Styles icon at the bottom of your layers palette. (fx)

I used these settings below, but you adjust for your image!

Getting closer! Now let's define the edges just a little bit more! (still on the gray flower layer).
11. Filter>Artistic>Poster Edges


Nice! Now let's go the extra mile and make it awesome!
12. Let's apply the Cutout filter: Filter>Artistic>Cutout
These were my settings but you adjust for your image!
Remember every single image you ever do will be different!


Don't worry if you see lots of jiggly lines everywhere.
You can just erase them by using a white paintbrush (on a new layer in case you mess up!)
Tweak it as much as you want to!
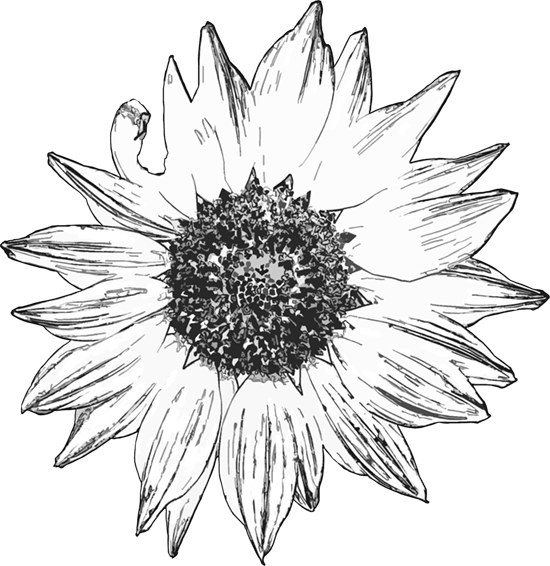
Finished Image:
Enjoy this image for free! Download the full size PNG here. (Right click and "save target as")
I hope you learn something from this tutorial! I'll be doing more photoshop tutorials in the near future so stay tuned to my blog!
I would LOVE to hear your feedback on this tutorial and also to see what you have done with it. It will boost my confidence to make another one!! =) **grin**
- www.TiffanysGarden.com my crafty personal blog where you'll find my watercolor painting, bible journaling, Distress Ink stuff and organizing my craft stash!
- www.TiffanyDoodles.com where you can find all of my drawings that you can color yourself!
- @Tiffer73 Instagram - ALL of my art and craftiness!!
- Distress Ink for Watercolor Facebook Group If you like to use your Distress Ink in a more traditional style of watercolor, then come join our group!
- My Watercolor Painting Facebook Page
- My Sewing and Crocheting Facebook Page


25 comments:
way to hard for me Tiff. I have a real phobia about Photoshop.
Did copy your finished image to my 'colouring' folder. Thanks so much for sharing. Going to miss this group - my new scrapbook one only has me posting
Whole new idea this printing off an image to colour - that's an extra new thing
Wow! I love it, maybe I'll try something like that for my Christmas cards. My daughter is also learning photoshop in school so this would be a great Mom and daughter project!
SOOOOoooh cool! I have to find the right pic for this. LOVE how you go into such great detail! Thanks!
This is really cool.. I have been working with PS and finding so many fun things to do...Great tutorial.
I'm so glad you are enjoying this tutorial!! Love to see what you make with it!!
OMG TIFFANY! YOU ROCK!! I even took web design and don;t have this down! Thank you! I love your blog. Now follow'n, please hop on over and follow along withme too! WOuld love it!
HUGS AND THANK YOU!!!
Rach ~ Queen La Rubba
I know I am a little late on this, but I love this tutorial- you did a great job explaining how to turn a photo into a digital stamp- I love it when people are able to take their passions and intertwine them!
Way to go!
Angela
SewManyCards.com
Awesome tutorial.
I just love this blog, as a fellow stamper and photographer, I really enjoyed your PS tutorial. I will definitely try the digital stamp images. I love PS, I'm always finding new things to learn with it.
I HEART PS, thanks for your tut, it was really easy to follow. I love your doodles, thank you for sharing your skill and art.
great tutorial, Tiffany! Hubby just bought me a new desktop pc and next is for me to get my hands on photoshop and then I can't wait to try this!! Thanks for posting it!!
Thanks so much Tiffany! I had found a tut on turning a photo into a line art but it didn't extract part of the image like you did. I am so glad that I just found your blog! I was looking for sunflower digital stamp images and yours was in the search. What about adding the stem and leaves? Would you draw around them together with the flower or do them separate? I'm a digi newbie and am going to look at the rest of your blog bc you are awesome with the details and it REALLY helps!
Many blessings! Deborah/JoyfullyOrange
http://joyfullyorangepapercrafts.blogspot.com
Hi Tiffany, I got your comment on my blog, my email is orangeinheaven@gmail.com. The one other thing I really need to know is how to add styles, actions and such into my program to use them! I use Gimp but should be able to use most PS tutorials or instructions (from what I've seen so far anyway). Thanks for the help!!
Many Blessings, Deborah/JoyfullyOrange
This is AMAZING!!! Thanks so much--pinning this for future reference! :)
I'm so glad you are enjoying this tutorial!! thanks for sharing.
Clipping Creations India | ecommerce image editing service
Could you link me some example images of stuff you shot? This sounds very interesting. outer campaign
It’s master class and the post is helpful. I think that it help me professional work. Kids Binoculars
Very enthusiastic! I am seeing and hearing your wineglass tutorial.In point of fact, you create this effectively and efficiently. Visit here
Thanks for taking the time to explain things in such great detail in a way that is easy to understand. auto geek blogs
I really like you blog.
Cinconize Infographs
So useful and informative blog you have shared . Liked and appreciated this well published. Image Retouching
Photo Editing Helps
Neck Joint
Photoshop Guideline
Clipping Path Tutorial
Drop Shadow Helps
Background Remove
Image Editing
Image Cut Out
Photo Manipulation
A fantastic tutorial. I loved it very much. Thanks for this amazing post.
A very good tutorial. Considering the age of this post it has helped a whole lot of people. Thanks very much for helping us.
Great tutorial. Good job!
Take Great Photos with iPhone
Post a Comment