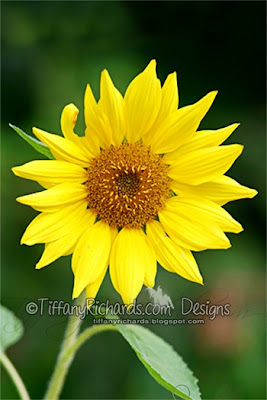
For this tutorial I'm using Photoshop CS3, but this lesson should work with most any version b/c it uses basic tools and filters. (I'm not sure about Photoshop Elements b/c I've never used it) This tutorial can work on most any type of photo, depending on what type of digital image you want to achieve. You can either isolate an object from a photo (like below) or, use the entire photo as a "scene" for a digital stamp image.
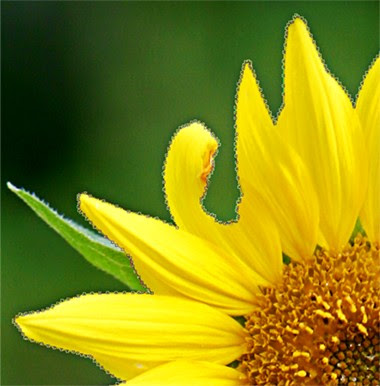
1. Let's start by isolating your object from the background of the image. Use your pen tool to create a new work path and select your object.


If you need help using the pen tool do a google search for a pen tutorial. Depending on your image there are other ways of selecting your object; such as selecting by color range. I find it easier to zoom in really close to select your image with the pen tool. Use your space bar to pan around the image as needed. Depending on the detail of your image this step could take a while, but will be worth it in the end! Here you can see my selection path!
2. After you have selected your object (by connecting the last dot to the first dot!) Then Save Your Selection as a New Path by dragging your "new path" on the palette down to the "create new path" icon at the bottom of your Path palette. It will name itself Path 1.

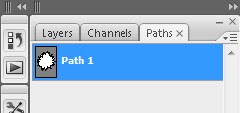
3. Next, Convert Your Path to a Selection by clicking the dotted circle icon at the bottom of your palette.

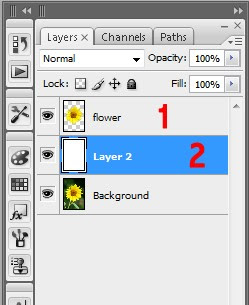
4. Then go back to your layers palette and hit "cmd/ctrl J" to duplicate your selection.
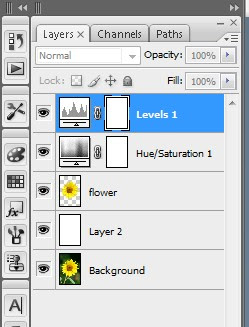
Name this layer "flower". (1)
Then create a new layer below the flower layer and fill with white. (2)
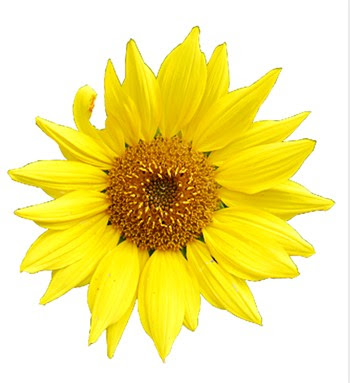
5. Now, you need to desaturate your image, that means remove all the color. At the bottom of your layers palette click the New Adjustment Layer icon (the half full moon). Click "Hue/Saturation" and slide the Saturation slider all the way to the left. This will make your image look black and white.

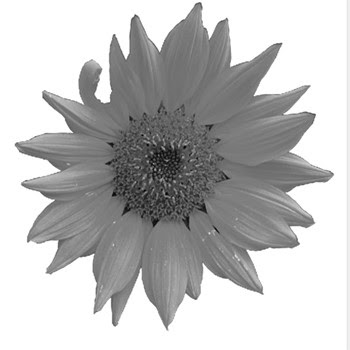
6. Your image may seem rather flat, so lets Add Another Adjustment Layer with levels to increase the contrast. Selects "Levels".
On the levels dialogue box the left black slider represents your shadows. The right white slider are your highlights. The middle grey is for your midtones.
I moved my shadows closer in to where the shadow information starts on the scale. I did the same with the highlights moving to the left.
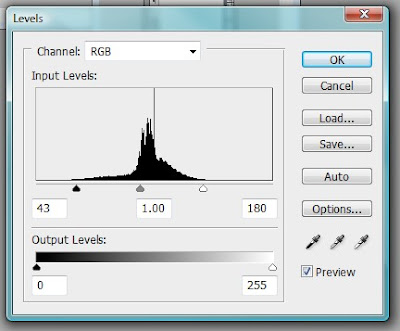
Look at your own image and decide what looks best.
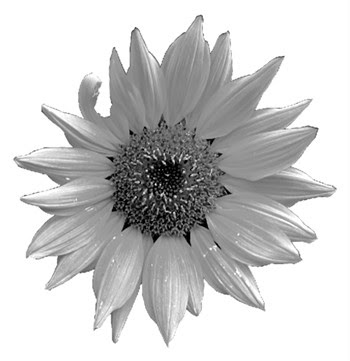
This will make better end results with the boost in contrast.
7. Let's put this new grayscale image on it's own new layer.
Hold Cmd/Ctrl and hit your flower layer and that will automatically select what you have on that layer.
Then do a Cmd/Ctrl + Shift + C and copy merge everything that is selected.
Then do a Cmd/Ctrl + V and paste and it will automatically paste onto a new layer. Be sure it is above all other layers.
You can name this new layer: "gray flower" or whatever you would like!! Your Layer palettes should look something like this:
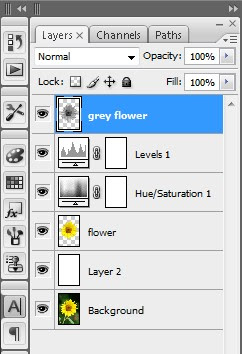
Okay, lets start making this thing look like a stamp!! Now the real fun begins!
8. While you are still on the "gray flower" layer apply the "Smart Blur" filter.
Filter>Blur>Smart Blur
Set the Quality to High and the Mode to Edge Only.
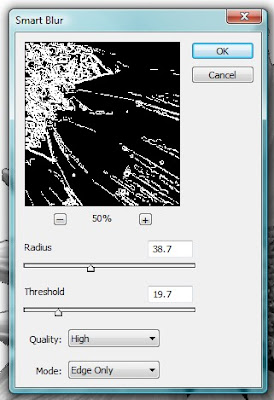
These are the settings I used (above). You adjust your settings to fit your own image. Watch your image as you move the sliders.
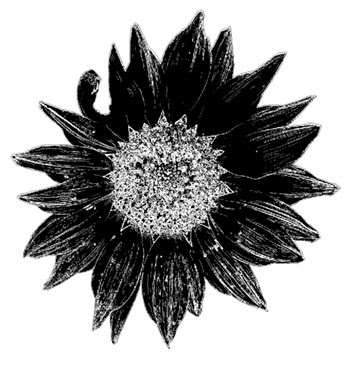
Looking cool, huh? Now let's invert the image!
9. While still on the "gray flower" layer go to Image>Adjustments>Invert
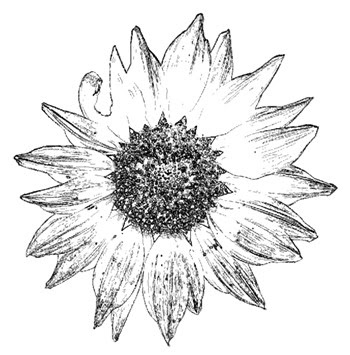
Eeewww, groovy baby!! Stay on that gray flower layer, don't leave it yet!
Now, let's apply a black stroke to the flower!
10. Click on your Layer Styles icon at the bottom of your layers palette. (fx)

I used these settings below, but you adjust for your image!
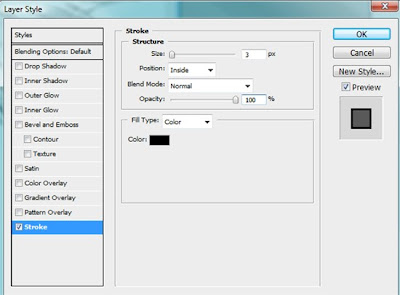
Getting closer! Now let's define the edges just a little bit more! (still on the gray flower layer).
11. Filter>Artistic>Poster Edges
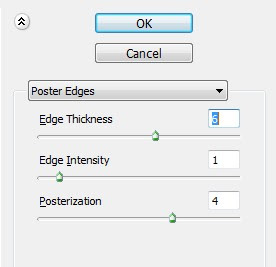
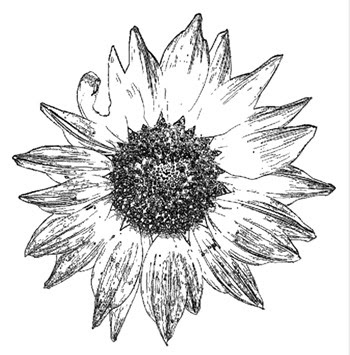
Nice! Now let's go the extra mile and make it awesome!
12. Let's apply the Cutout filter: Filter>Artistic>Cutout
These were my settings but you adjust for your image!
Remember every single image you ever do will be different!
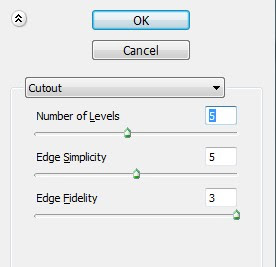
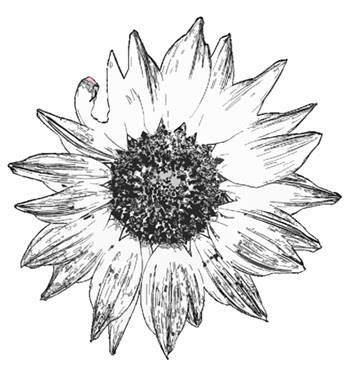
Don't worry if you see lots of jiggly lines everywhere.
You can just erase them by using a white paintbrush (on a new layer in case you mess up!)
Tweak it as much as you want to!
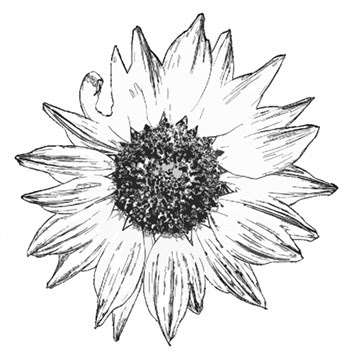
Finished Image:

Enjoy this image for free! Download the full size PNG here. (Right click and "save target as")
I hope you learn something from this tutorial! I'll be doing more photoshop tutorials in the near future so stay tuned to my blog!
I would LOVE to hear your feedback on this tutorial and also to see what you have done with it. It will boost my confidence to make another one!! =) **grin**
- www.TiffanysGarden.com my crafty personal blog where you'll find my watercolor painting, bible journaling, Distress Ink stuff and organizing my craft stash!
- www.TiffanyDoodles.com where you can find all of my drawings that you can color yourself!
- @Tiffer73 Instagram - ALL of my art and craftiness!!
- Distress Ink for Watercolor Facebook Group If you like to use your Distress Ink in a more traditional style of watercolor, then come join our group!
- My Watercolor Painting Facebook Page
- My Sewing and Crocheting Facebook Page


 I'm a self-employed web designer & photographer since 1998. But that's all business and this blog is all about my crafty hobbies! Throughout this blog you will find things like watercolor painting, paper crafting, stamping, card-making, copics, my own hand drawn digital stamps, beading, cooking, gardening, photography, photoshop, the antics of my 4 legged children, Emma & Francie!

 Sign up with your email and I'll let you know everytime I add a new digital stamp, photo, paper craft, or painting! Don't forget to click the link inside your sign up email from Feedburner to complete the subscription!
