

 I'm a self-employed web designer & photographer since 1998. But that's all business and this blog is all about my crafty hobbies! Throughout this blog you will find things like watercolor painting, paper crafting, stamping, card-making, copics, my own hand drawn digital stamps, beading, cooking, gardening, photography, photoshop, the antics of my 4 legged children, Emma & Francie!

 Sign up with your email and I'll let you know everytime I add a new digital stamp, photo, paper craft, or painting! Don't forget to click the link inside your sign up email from Feedburner to complete the subscription!


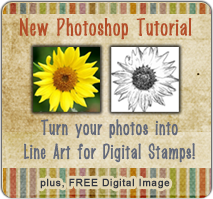
Welcome members of the WhatsDigitalStamping? Yahoo group!! This tutorial is just for you! For this coloring lesson, I decided to follow through with an entire card tutorial! I used my own digital stamps from my new releases!
Materials Used
- Digi Stamp Bunny - TiffanyDoodles.com
- Digi Stamp Fawn - TiffanyDoodles.com
- Flower Embellishments - Nellie Snellen Punches - Dutch Paper Crafts
- DP (Designer Paper) - Basic Grey - Lily Kate
- Border Punch - EK Success
- Nestibilities Die Cut - Blossom
- Lavender Embroidery Thread
- Cotton ball (for his little tail)
- Clear EP (embossing powder) & heat tool
- Memento Ink - Angel Pink
- Paper Piercer
- Wiskers - clear fishing line
- Glue - Tombow
- Sentiment - I thought of it and printed from computer
- Cardstock used on digis and sentiment is GinaK 80#
- Copics: E33, E31, E30
- Prismacolor Pencils: Sienna Brown, Burnt Ochre, Light Umber, Beige, Chocolate, Cream, Blender Pencil

How'd I make that?
First of all I printed my digis from Photoshop onto GinaK cardstock. Before it even got out of the printer good I (very quickly) covered it with clear embossing powder. Shook it off and set with my heat tool.
I am attempting to color this fawn with the feathering technique. I don't claim this to be the "official" feathering technique, it's just the way I like to do it! I began coloring with my E33 and swished the areas that I want to be darker. Personally, (when doing this technique) I don't saturate my paper at first. I just applied the E33 by lightly swishing one layer. ▼

Next up, is the mid-tone color which I choose to be E31. I "swished" this color upwards into the darker color. I did about 2 (or so) layers of this, until it looked somewhat blended. ▼

Next, I choose the highlight color E30 and swished that color into the E31 until it looked blended. I went back over these 3 steps one more time to darken up a little bit. ▼

The fawn could easily be complete now, but I prefer to add just a little bit more contrast with my Prismacolor pencils. The prismacolor pencils come in 132 colors. So when matching them up with your copics (342?) you just pick the closest color you can. TIP: Always be sure you are done coloring with your copics before you start laying down your pencils. Do not use your copics on top of colored pencils. They will ruin.
I began with my darkest color, sienna brown, and colored in my dark areas over my copics. ▼

Next I used my Burnt Ochre and colored in next to the darker color. ▼

Next to that color, I layed down the Light Umber & Cream color. ▼

I also added some beige in the very light areas, and Chocolate (just a very little bit) in the very dark areas. Then I took my Prismacolor-less Blender and blended those pencils together. The blender pencil really smooths out the pencil lines and make it looks soooo slick!! I love this look! ▼

Here you can see the difference in contrast that the colored pencils added! ▼


Now, to continue with the rest of the card! I cut my paper to fit my 4x5.5" card and cut out 2 small hills freehand. I used my paper piercer to punch holes along the edge of the hills and embroidered lavender thread on the hilltops! Then glued it all down. ▼

Next up are those beautiful flower embellishments! I LOVE being able to make my own flowers with my Nellie Snellen punches I just got from Darlene at Dutch Paper Crafts! I have 2 flower sets. See one full set in the photo below. The larger punch (on the right) punches your flower. Next, you place that flower face down in the matching embossing punch. It adds beautiful texture and curls your petals perfectly!! Then you do the same with the smaller size flower punch and embosser. It also has a stamen punch, which is the smallest punch in the photo. The leaf punch is not shown b/c I didn't use it in this particular card. ▼

Here are the pieces I made for this card. The 2nd flower set has odd shaped petals and has extra dimension. It also has a stamen and leaf punch, but I didn't use it here. I absolutely love these punches and the ability to make my own flowers to match anything I make!! ▼

Next up is my little bunny foo foo! When cutting him out I cut off his outer eyelashes and whiskers - on purpose! Not in a mean way, I plan to give him new ones w/a little "hare" replacement surgery!! (hehehe, couldn't resist that one!) Oh, I needed to mention that I colored him with my V0000 and VR0000 copics. I wanted him to look white with a pinkish tint! In this photo below, I wanted to show how I put his "falsies" on! I cut some fishing line and colored it with my black sharpie marker. I did a little strip of tape from a tape runner and used my tweezers to place his new "hare" into perfect position! ▼

Next, I used my precision tip Cutter Bee scissors to cut out my little fawn to go next to my little bunny! See you can't even tell bunny has had any surgery!! ▼

I used some 3D foam tape and cut it into pieces small enough to fit the back of my fawn and bunny. ▼

I printed my sentiment from my computer onto GinaK cardstock and then cut with my Nestibilities blossom die. I sponged the edges with Memento Angel Pink with my little finger dauber! ▼

I assembled all the pieces to my card! I stuck on the bunny & fawn. Then glued on my pretty flowers! I just LOVE how the stick up from the paper! I also HAD to add a little piece of cotton my fur-babies tail! ▼


I hope you enjoyed this coloring/card tutorial! If you like it; I'll make more!


16 comments:
Wow...Thanks for this detailed tut! And I loved seeing the two images side by side at the end...Man do I have alot to learn :)
Wonderful tutorial! I love your coloring and ALL your awesome Copic Hints and TIPS!! I am also a HUGE Fan of Copics and LOVE them!!
Thanks for sharing with us ALL!
Lisa
ThePurplePlace
wow that is an awesome tutorial and your coloring rocks.
This is great Tiff, I love the richness the pencils add and the step by step photos are so helpful! Those punches are the bee's knees too!
I am now a member of your Yahoo group! I would love to learn more about digi stamping and coloring with Copics. By putting the 2 colored deer side by side, I sure can see the difference. Where do you get the Prismacolor blending pencil? I don't have the blender. I've always used a cotton swab and mineral spirits to blend. Will that work on top of the Copics? LUV the tutorial...keep 'em coming :-)
Thank ya'll so much for your wonderful comments! The blender pencil came from Hobby Lobby, but I'm sure most art stores would have them! I haven't tried the Mineral Spirits on top of Copics, but it sounds like something I would like to try!! If you try it first.... let us know how it goes!!
Gorgeous card- wonderful tutorial Tiffany! The side by side really shows the depth the colored pencils add- WOW!!! Thanks for doing this!
Hi Tiffany! Great tutorial! Love how the colored pencils add so much depth to the Copic coloring!
Beautiful coloring on that fawn...makes him so much more dramatic popping out! Thanks for sharing!
Feel free to ask any questions! I look forward to seeing your creations!
THANK YOU! This tutorial rocks. I can't wait to try this technique. (I love the "falsies" too)
Great card and beautiful coloring...Thanks for the tutorial!
~Courtney~
hi hun great card, just wanted u to know that for some reason i cant leave a comment on tiffanys doodles to win one of stamps,ive posted ur blinkie and a link to ur site, a link to this 1 as been there from start, if i can and am lucky enough i wud love to win fawn, the one used in this card, if not np, my computer always as a mad 1 and many times wont let me commment, but love ur images,and cards u make. ur very talented.
my blog-charscards.blogspot.com
Stunning card, great tutorial...Now I have to have the prisma pencils...Thanks a bunch LOL! I really love the difference between just the copics and when you added the pencils! Great job!!
Jessica
Oh my gosh, this is stunning. All the work you put in your cards and the results are amazing. I have never tried my prismas over my copics. It looks so much easier than trying to get the perfect blend with the copics. I also love to use the blender pencil rather than gamasol or the like. Thank you for the great tutorial.
FABULOUS - they're really lovely. Great image with the pencils over the top ..I have to try that.
Thanks for the great tut. xxx
Post a Comment