Thursday, April 29, 2010
Simple Flower - Freebie Thursday!
This digi stamp was originally offered as a freebie, but only for a limited time. View Simple Flower Digital Stamp in the Tiffany Doodles Digital Stamp Store! Be sure to upload your TD digi stamp project to our Tiffany Doodles Flickr Group Gallery! It may be used as an example in the Tiffany Doodles Store!

Wednesday, April 28, 2010
Monday, April 26, 2010
Contest! Name the Biddies & Win Digis!
I'm so happy I finally got some little biddies! A neighbor had these Easter chicks that they let me have!! David fixed me up a quick little chicken coop and we got a few supplies to get started! The girls are so excited about the biddies, they are obsessed with them! They have already learned their lessons about running the biddies and scaring them up! Now everybody is getting along splendidly! Once they become free range chickens in my garden shed yard we will see how that goes! For right now they are very happy little chickadees inside their coop! Here are a few photos to share!
I'm having a contest to name them!! Just leave a comment here (ON THIS POST) with your suggestions for 3 names!! The winner will be chosen by me & my family (a week from now)!! The prize will be my cute little biddie digi!! (see digi at bottom of post).
I'm having a contest to name them!! Just leave a comment here (ON THIS POST) with your suggestions for 3 names!! The winner will be chosen by me & my family (a week from now)!! The prize will be my cute little biddie digi!! (see digi at bottom of post).
Edited to Add: For those of you wondering... The biddies are colored b/c dye is injected into their egg before they hatch. It is very popular to do around Easter time and it is also COMPLETELY HARMLESS.
Edited to Add: And the winner is, Momof5kiddos! Congrats! We chose 2 of your choices! The purple chick will be Daisy and the yellow chick will be Buttercup! And my lovely Aunt Nella named the green one Fern! What a fun contest! Thank you to everyone who participated!

Saturday, April 24, 2010
Blooming Wisteria!
I love it when the wisteria blooms every spring! It grows wild and can take over entire forests. Traveling the dirt roads and highways where we live you can see the woods absolutely covered in purple and lavender. I had to take a quick snapshot of the this old condemned house that was taken over by the wisteria!! It can take over my house anytime!! I would just trim out a little pathway to my door and little peepholes for the windows. I would love that!!

Friday, April 23, 2010
Kitty helps in the Garden!
I am so happy that spring is here and I can get out in my Garden Shed! The other day I started a few pots with some petunias, geraniums, & some purslane. Cornbread really enjoys helping with my plants, can't you tell?
What? You can't see him? Here's a close-up for you! Well, maybe he's dreaming about helping me!! Oh, in case you are wondering, he is about 18 lbs of pure love and affection!!
What? You can't see him? Here's a close-up for you! Well, maybe he's dreaming about helping me!! Oh, in case you are wondering, he is about 18 lbs of pure love and affection!!

Thursday, April 22, 2010
Bird of Paradise - Freebie Thursday!
This digi stamp was originally offered as a freebie, but only for a limited time. View Bird of Paradise Flower Digital Stamp in the Tiffany Doodles Digital Stamp Store! Be sure to upload your TD digi stamp project to our Tiffany Doodles Flickr Group Gallery! It may be used as an example in the Tiffany Doodles Store!

Tuesday, April 20, 2010
New Blog Design for Jenyfur!
I just gave Jenyfur's blog, Torn Paper, some brand spankin' new clothes!! Check out her fun blog here!!
You want a new blog design too? CLICK HERE!
You want a new blog design too? CLICK HERE!

Monday, April 19, 2010
Paper Crafters Blog Hop!!
Here is how it works:
1. Click the blue frog below to add your blog.
2. Copy the following script and put it on your blog post while in HTML view.
<script src=http://www.inlinkz.com/cs.php?id=2173></script>
This will make the thumbnail collection appear on your post as well and be available for your readers too.
3. Provide the above code on your blog for others to grab. Just mention to paste it on HTML view when blogging.
4. Ask your readers to add their blogs on the list and also copy and paste the script on their blog as well!
This will make a thumbnail collection that will grow on everyones blog and we can meet each other! I’ll be moderating it so no worries. It will be updated on everyones blog when someone enters a new link.
1. Click the blue frog below to add your blog.
2. Copy the following script and put it on your blog post while in HTML view.
This will make the thumbnail collection appear on your post as well and be available for your readers too.
3. Provide the above code on your blog for others to grab. Just mention to paste it on HTML view when blogging.
4. Ask your readers to add their blogs on the list and also copy and paste the script on their blog as well!
This will make a thumbnail collection that will grow on everyones blog and we can meet each other! I’ll be moderating it so no worries. It will be updated on everyones blog when someone enters a new link.

Thursday, April 15, 2010
Frilly Heart Freebie!
This digi stamp was originally offered as a freebie, but only for a limited time. View Frilly Valentine's heart Digital Stamp in the Tiffany Doodles Digital Stamp Store! Be sure to upload your TD digi stamp project to our Tiffany Doodles Flickr Group Gallery! It may be used as an example in the Tiffany Doodles Store!

Birdhouse - Freebie Thursday!
This digi stamp was originally offered as a freebie, but only for a limited time. View Birdhouse Digital Stamp in the Tiffany Doodles Digital Stamp Store! Be sure to upload your TD digi stamp project to our Tiffany Doodles Flickr Group Gallery! It may be used as an example in the Tiffany Doodles Store!

Thursday, April 08, 2010
2 Butterflys - Freebie Thursday!
This digi stamp was originally offered as a freebie, but only for a limited time. View 2 Butterflys on Flower Digital Stamp in the Tiffany Doodles Digital Stamp Store! Be sure to upload your TD digi stamp project to our Tiffany Doodles Flickr Group Gallery! It may be used as an example in the Tiffany Doodles Store!

Monday, April 05, 2010
Blog Candy - Win this new Fawn Set!
Win this set of cute little fawns! See this post at Tiffany Doodles for details! Winner will be announced Friday (4/9/10)! Good Luck!
Congrats Cheryl of She Stamps for winning this lovely fawn set!

Copics w/ Colored Pencil Overlay Tutorial!
Welcome members of the WhatsDigitalStamping? Yahoo group!! This tutorial is just for you! For this coloring lesson, I decided to follow through with an entire card tutorial! I used my own digital stamps from my new releases!
Materials Used
- Digi Stamp Bunny - TiffanyDoodles.com
- Digi Stamp Fawn - TiffanyDoodles.com
- Flower Embellishments - Nellie Snellen Punches - Dutch Paper Crafts
- DP (Designer Paper) - Basic Grey - Lily Kate
- Border Punch - EK Success
- Nestibilities Die Cut - Blossom
- Lavender Embroidery Thread
- Cotton ball (for his little tail)
- Clear EP (embossing powder) & heat tool
- Memento Ink - Angel Pink
- Paper Piercer
- Wiskers - clear fishing line
- Glue - Tombow
- Sentiment - I thought of it and printed from computer
- Cardstock used on digis and sentiment is GinaK 80#
- Copics: E33, E31, E30
- Prismacolor Pencils: Sienna Brown, Burnt Ochre, Light Umber, Beige, Chocolate, Cream, Blender Pencil
How'd I make that?
First of all I printed my digis from Photoshop onto GinaK cardstock. Before it even got out of the printer good I (very quickly) covered it with clear embossing powder. Shook it off and set with my heat tool.
I am attempting to color this fawn with the feathering technique. I don't claim this to be the "official" feathering technique, it's just the way I like to do it! I began coloring with my E33 and swished the areas that I want to be darker. Personally, (when doing this technique) I don't saturate my paper at first. I just applied the E33 by lightly swishing one layer. ▼
Next up, is the mid-tone color which I choose to be E31. I "swished" this color upwards into the darker color. I did about 2 (or so) layers of this, until it looked somewhat blended. ▼
Next, I choose the highlight color E30 and swished that color into the E31 until it looked blended. I went back over these 3 steps one more time to darken up a little bit. ▼
The fawn could easily be complete now, but I prefer to add just a little bit more contrast with my Prismacolor pencils. The prismacolor pencils come in 132 colors. So when matching them up with your copics (342?) you just pick the closest color you can. TIP: Always be sure you are done coloring with your copics before you start laying down your pencils. Do not use your copics on top of colored pencils. They will ruin.
I began with my darkest color, sienna brown, and colored in my dark areas over my copics. ▼
Next I used my Burnt Ochre and colored in next to the darker color. ▼
Next to that color, I layed down the Light Umber & Cream color. ▼
I also added some beige in the very light areas, and Chocolate (just a very little bit) in the very dark areas. Then I took my Prismacolor-less Blender and blended those pencils together. The blender pencil really smooths out the pencil lines and make it looks soooo slick!! I love this look! ▼
Here you can see the difference in contrast that the colored pencils added! ▼
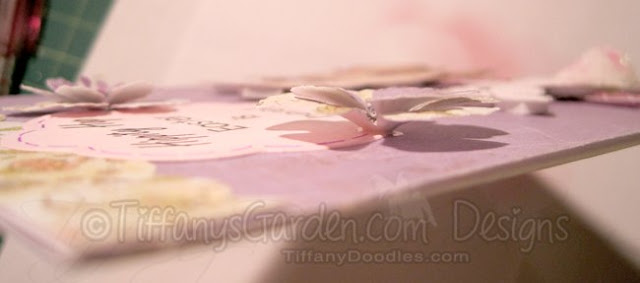
Now, to continue with the rest of the card! I cut my paper to fit my 4x5.5" card and cut out 2 small hills freehand. I used my paper piercer to punch holes along the edge of the hills and embroidered lavender thread on the hilltops! Then glued it all down. ▼
Next up are those beautiful flower embellishments! I LOVE being able to make my own flowers with my Nellie Snellen punches I just got from Darlene at Dutch Paper Crafts! I have 2 flower sets. See one full set in the photo below. The larger punch (on the right) punches your flower. Next, you place that flower face down in the matching embossing punch. It adds beautiful texture and curls your petals perfectly!! Then you do the same with the smaller size flower punch and embosser. It also has a stamen punch, which is the smallest punch in the photo. The leaf punch is not shown b/c I didn't use it in this particular card. ▼
Here are the pieces I made for this card. The 2nd flower set has odd shaped petals and has extra dimension. It also has a stamen and leaf punch, but I didn't use it here. I absolutely love these punches and the ability to make my own flowers to match anything I make!! ▼
Next up is my little bunny foo foo! When cutting him out I cut off his outer eyelashes and whiskers - on purpose! Not in a mean way, I plan to give him new ones w/a little "hare" replacement surgery!! (hehehe, couldn't resist that one!) Oh, I needed to mention that I colored him with my V0000 and VR0000 copics. I wanted him to look white with a pinkish tint! In this photo below, I wanted to show how I put his "falsies" on! I cut some fishing line and colored it with my black sharpie marker. I did a little strip of tape from a tape runner and used my tweezers to place his new "hare" into perfect position! ▼
Next, I used my precision tip Cutter Bee scissors to cut out my little fawn to go next to my little bunny! See you can't even tell bunny has had any surgery!! ▼
I used some 3D foam tape and cut it into pieces small enough to fit the back of my fawn and bunny. ▼
I printed my sentiment from my computer onto GinaK cardstock and then cut with my Nestibilities blossom die. I sponged the edges with Memento Angel Pink with my little finger dauber! ▼
I assembled all the pieces to my card! I stuck on the bunny & fawn. Then glued on my pretty flowers! I just LOVE how the stick up from the paper! I also HAD to add a little piece of cotton my fur-babies tail! ▼
I hope you enjoyed this coloring/card tutorial! If you like it; I'll make more!



 I'm a self-employed web designer & photographer since 1998. But that's all business and this blog is all about my crafty hobbies! Throughout this blog you will find things like watercolor painting, paper crafting, stamping, card-making, copics, my own hand drawn digital stamps, beading, cooking, gardening, photography, photoshop, the antics of my 4 legged children, Emma & Francie!

 Sign up with your email and I'll let you know everytime I add a new digital stamp, photo, paper craft, or painting! Don't forget to click the link inside your sign up email from Feedburner to complete the subscription!
